When it comes to RV camping, ensuring stability and safety is of utmost importance. One crucial accessory that often goes overlooked is the down rigger pad. These handy pads play a significant role in providing a stable foundation for your RV’s stabilizing jacks, leveling systems, and other equipment. We explore the importance of down rigger pads for your RV and how they contribute to a safer and more comfortable camping experience, along with how to make your own pads.
Skip to the how to section here
Improved Stability
a primary benefit of down rigger pads is the enhanced stability they offer. When parking your RV on uneven or soft surfaces, stabilizing jacks alone may not provide sufficient support. Placing down rigger pads under the jacks distributes the weight more evenly and prevents sinking or shifting, providing a solid and stable foundation for your RV. This stability minimizes rocking and swaying, improving comfort for you and your fellow campers.
Easy Leveling
Leveling your RV is essential for several reasons, including comfort, proper functioning of appliances, and efficient use of resources. Down rigger pads can greatly facilitate the leveling process. With their ability to adapt to uneven terrain, these pads provide a stable base for your jacks or leveling blocks, making it easier to achieve a level RV. This not only improves comfort inside the vehicle, but also ensures the optimal functioning of appliances such as refrigerators, stoves, and showers.
Safety and Security
Using down rigger pads contributes to the overall safety and security of your RV and its occupants. A level and stable RV reduces the risk of accidents caused by an unsteady environment. When parked on an incline, the doors may not align properly, causing difficulty in opening and closing. By employing down rigger pads, you can minimize these safety concerns, allowing for safe entry and exit from your RV.
Protect Your RV's Components
The constant pressure and movement that an unbalanced RV exerts on its components can lead to premature wear and tear. This stress can cause misalignments, leaks, and even damage to the frame or structure of your RV. By using down rigger pads, you reduce the strain on the RV’s jacks and leveling systems, preventing them from being overextended or overloaded. This not only protects your RV’s components, but also saves you from costly repairs down the road.
Easy Installation and Maintenance
Using down rigger pads is a straightforward process. Simply place them under the jacks or leveling blocks, ensuring a stable and level position. When not in use, they can be easily cleaned and stored. Regular inspection for any signs of damage or wear is recommended to maintain their effectiveness and ensure safe usage.
Investing in down rigger pads for your RV is a wise decision that enhances stability, improves safety, and protects RV components. These often underestimated accessories provide a solid foundation, ease the leveling process, and contribute to a comfortable camping experience. By incorporating down rigger pads into your RV gear, you can ensure a more secure and enjoyable journey, allowing you to focus on the wonders of the great outdoors with peace of mind.
How to build your own down rigger pads at home
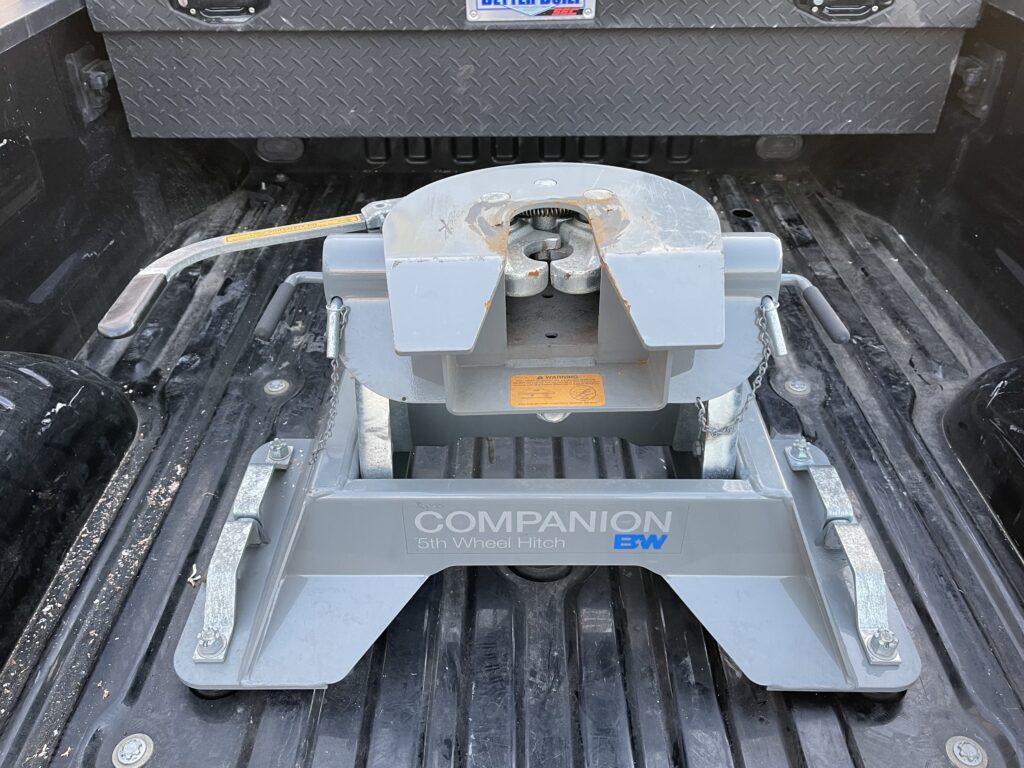
To build your own down rigger pads out of wood is cost effective and an easy to do at home. With only a couple 2×4’s or 2×6’s and a sheet of ply wood you will be able to build all the down rigger pads you will need for your RV. We built six 18”x18” down rigger pads and a pad to raise our 5th wheel hitch stabilizer with the material listed below.
- One sheet of 19/32 plywood
- Four 16 foot 2x6’s
- Skill saw
- Drill and two drill bits (3/32" bit and 1/2" bit)
- tape measure
- 1/2" rope
- screws (108 2 1/2“ exterior screws, and 60 1 1/2" exterior screws)
- 16” x 24” framing square
Building the down rigger pads | these instructions will build one down rigger pad
- Take one 2×6 and cut two 18” studs and four 15” studs
- Use the 18” studs, the top and bottom cap, and two of the 15” studs to form a box
- Measure 1/2” from each end of the 18” stud and drill two holes 3” apart
- Place the 15” stud up to the 18” stud and drill through the 18” stud and into the 15” stud
- Start the screws into the 18” studs so that the screws do not show on the back side
- Line up the 15” stud to the 18” and screw the two studs together
- Repeat for the other 15” and 18” studs
- Now to attach the two “L”s together
- Placing the two 15” Studs inside of two 18” studs drill holes into the 18” studs the same as before then drilling from the 18” into the 15” stud
- Screw the box together now
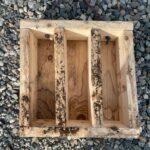
- Now measure 5” on the inside of box from the 15” stud on both sides and make a mark on the 18” stud
- Drill two holes at each mark on the 18” stud from the outside to the inside of the box
- Insert the two remaining 15” studs so that the center of the stud is centered with the mark on the 18” stud
- Screw the two 15” studs into place
- Now with the framing square measure and mark an 18” x 18” square onto the sheet of ply wood
- Cut the square out of the plywood
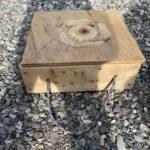
- Place the 18” x 18” plywood square onto the newly constructed frame.
- Drill holes in the corners and in the center of each side 3/4” in from the side of the plywood
- Screw the plywood down to the frame
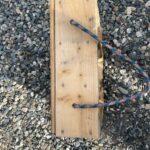
- On the 18” stud measure in 4” on both ends and drill a 1/2” holes
- Cut 24” of rope
- Insert rope from the outside into the box and tie a knot at both ends
This makes one down rigger pad. Repeat this process to make however many pads that you may need. To build a bigger pad go through the same process, but instead of the 18” and 15” measurement use whatever measurements that you need.
REMINDER – a 2×4 measurement is actually 1 1/2” x 3 1/2” and a 2×6 is actually 1 1/2” x 5 1/2” for when you make your larger pad.