is your fresh tank filling itself when it's not supposed to?
Having fresh water in your trailer is must when living full time in an RV. After setting the trailer up in a new park, there was a noise coming from outside near the water hookups. After walking outside, water was pouring out of the fresh water overflow port. So, we turned the water off and emptied the fresh tank since we were using the city fill and not the tank itself.
We played with the valves thinking that could be the reason the water was filling the fresh tank. After that, we turned the water back on thinking we solved the problem. few hours later, the same noise and water pouring out of the overflow port… now we had to start trouble shooting and little did we know it would be the water pump we never used.
trouble shooting the water leak
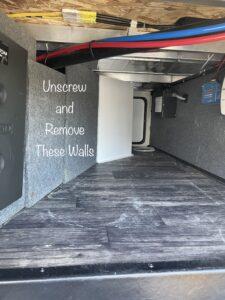
To start trouble shooting, you need to take apart the underbelly of the trailer so you can access the water lines. There is a wall that has a few screws holding it together to hide and protect the water lines and electrical wires in the underbelly. Once you have the wall removed:
- Crawl into the underbelly and check if there is anything visibly wet (ground, walls, etc.)
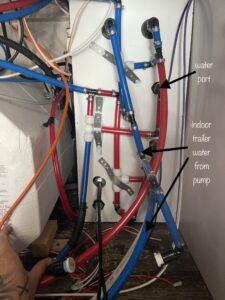
- If nothing is wet, then trace out the water line that connects to the city fill port
- The water line should split –
- one side of the line goes into the water heater then into the trailer
- there is also a valve that redirects the water into the fresh tank
- the other side of the split should go into the water pump
- Find the water pump and trace out the line (one side of the pump goes into the fresh tank)
- Next, (you’ll need two people) while in the underbelly, have another person turn the water on then listen to the water lines. As long as all the sinks, showers, and water inside of the trailer is turned off, there should be no moving water in the lines under the trailer
- If you can hear water moving, now you need to find what section of the water line has water movement (We heard the water moving near the pump)
Now that you have pin pointed the section of water line that has movement, you need to start taking things apart.
Tools and Parts needed for the job
- 12 inch channel locks,
- two 1/2 inch pvc threaded caps,
- plumbers thread tape,
- new water pump (if needed),
- black and white electrical tape, and
- towels
Removing the water pump
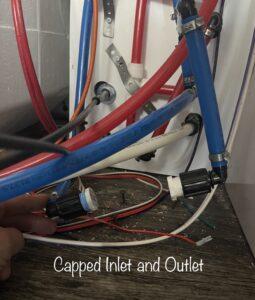
On the pump, there in an inlet and an outlet with water lines attached to both. take a picture of the pump and make sure: (see why you should take a picture here)
- the water is turned off to the trailer and open the low point valves to remove any water pressure from the lines
- to Open the fresh water dump valve and leave it open
- to Take the ½ inch PVC caps and add thread tape to each of the threads
- to Remove the water lines from the pump and cap the two water lines
- to Turn the water back on then do a check to see if there is water movement in the lines. (same as before) Then check to see if there is water emptying from the fresh water dump
- If no water comes out then the pump failed and it’s time to replace it
- to Go to the hook up and turn the valve to add water to the fresh tank and make sure that water pours out of the fresh water dump valve that you left open
Now that the pump has been removed and the lines have been capped, you can use the trailer like normal on the city fill until you get a new pump. See the pump we replaced here.
To remove the pump, remove the two electrical wires that are connected to the pump. (They should pull apart easily) Once the wires are removed, remove the screws holding the pump in place. Everything is now free and the pump can be removed.
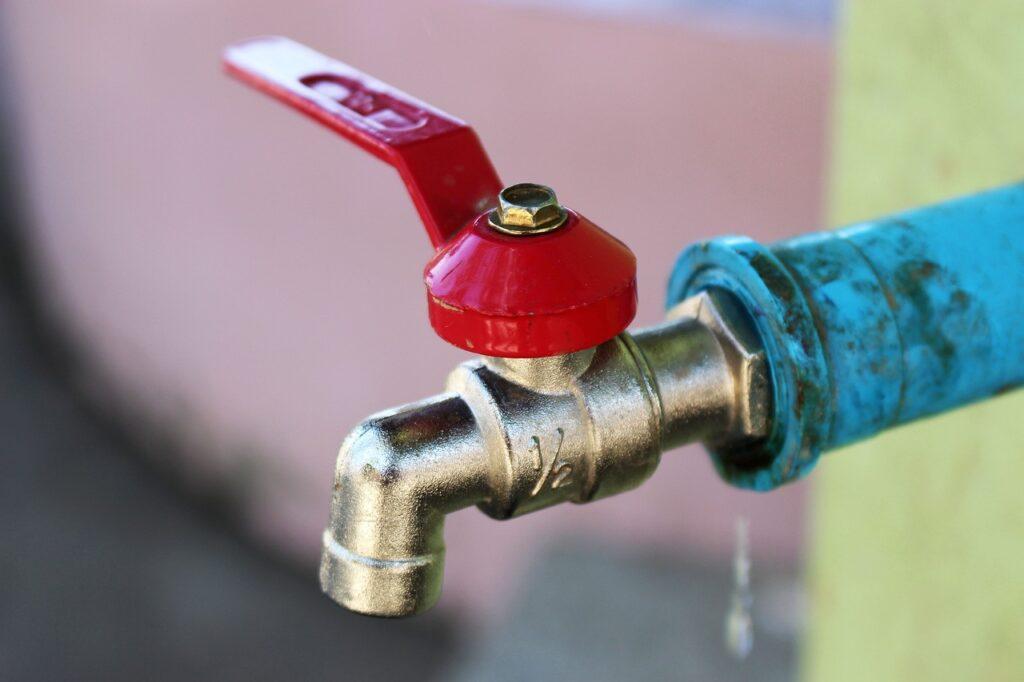
adding a valve to the outlet side of the water pump | something to think about
Typically water pumps go bad when the water pressure from the full time city fill tries to make the pump spin backwards.
To prevent a new water pump from going bad, you should consider adding a valve to the outlet side of the pump So when you are connected to city water you can keep the valve shut and there is no pressure on the pump.
Then, if you know you are going to go camping, you can open the valve before filling the fresh tank allowing the water pump to prime and then the trailer will be ready to go off grid.
Installing the new water pump
To install the new water pump, you go in the reverse order as you did for removing the pump:
- make sure the water to the trailer is turned off and the low point valves are opened
- screw the water pump to the floor of the underbelly making sure that the pump direction is the same as the old pump (Look at the picture you took as reference)
- Then, while looking at the picture, install the electrical wires the same way the old water pump was connected
- Put thread tape onto the pump threads and install the water lines to the pump
- Close the low point valves and turn the water on
- Check for any leaks coming from the pump
- As long as there are no leaks, fill the fresh tank partially
- Turn the fill water off
- Turn on the pump and try running water through the trailer sinks
- If water starts running, then the pump was installed correctly
- If water does not run properly, then go to the electrical wires, switch them, and try again
note: Depending on the pump, the wire connection may be different
in conclusion
Now that the pump has been replaced, leave the underbelly open for a couple days so you can watch and check for leaks. Once you have checked all the connections, close everything back up and the water leak and water pump project is complete.
view other how tos and trailer projects